
ROYAL AIR FORCE. COMMON CORE AND DEPLOYMENT SKILLS AIDE-MEMOIRE
YOUR AIMS
◉ Prevent casualty losing more body heat.
◉ Re-warm casualty.
◉ Arrange evacuation to medical aid.
SIGNS AND SYMPTOMS
◉ Apathy, confusion, irrational behaviour, possible belligerence.
◉ Lethargy.
◉ Shivering.
◉ Cold, pale, dry skin.
◉ Slow/shallow breathing.
◉ Slow, weakening pulse.
◉ Failing consciousness,
◉ Insulate casualty.
◉ Get casualty to shelter.
◉ Replace wet clothing with dry warm clothing.
◉ Protect casualty from the elements and the ground.
◉ Send for help, if possible.
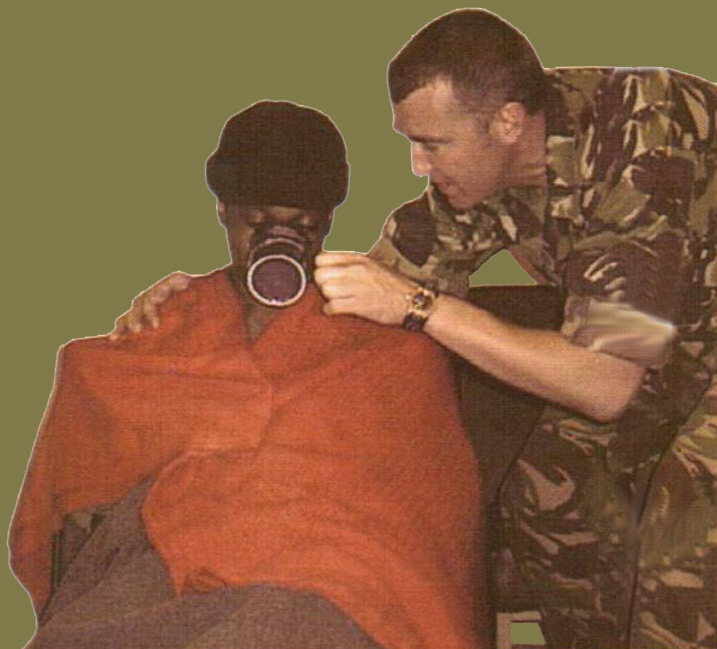
◉ Give conscious casualty sips of warm drinks (not alcohol).
◉ Evacuate by stretcher, if possible.
◉ Prepare to resuscitate, if necessary.
◉ Most animals and insects will not usually attack unless injured or provoked. Common sense can prevent many bites and stings. Animal bites always require medical attention, because animals harbour germs in their mouths. You must ensure that the casualty is protected from serious infection such as rabies and tetanus. Snake bites carry the additional risk of poisoning, even when handling dead animals; the venom of many creatures, particularly snakes, is just as active in death as in life.
◉ To control bleeding.
◉ Prevent infection both to casualty and yourself.
◉ Evacuate to medical aid.
SIGNS AND SYMPTOMS
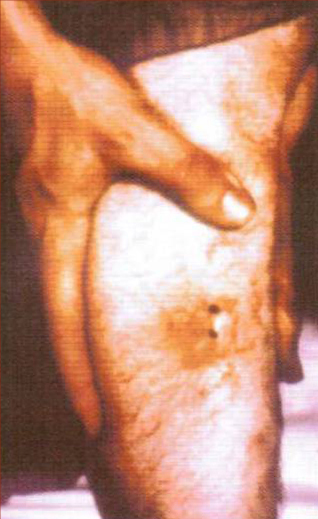
◉ Puncture wound at the sight of the bite.
◉ Bruising.
◉ Pain.
YOUR ACTIONS
◉ Clean the wound with soap and water.
◉ Control bleeding, apply pressure.
◉ Cover the wound with a sterile dressing.
◉ Evacuate to medical aid.
YOUR AIMS
◉ To relieve swelling and pain.
◉ To evacuate to medical aid, if necessary.
SIGNS AND SYMPTOMS
◉ An initial sharp pain.
◉ Swelling and soreness.
◉ Some people experience allergic reactions to stings (anaphylactic shock - a severe allergic reaction that can develop very quickly. The reaction may cause swelling around the face and neck. If you suspect anaphylactic shock seek immediate medical aid).
YOUR ACTIONS
For a sting in the skin:
◉ If the casualty shows signs of a generalised reaction, evacuate immediately to medical aid.
◉ If the sting is visible, brush off with a fingernail or a blunt edge.
◉ Apply a cold compress to relieve pain and minimise swelling.
◉ If pain and swelling persists, seek medical aid.
Be aware some people carry an Auto-Injector of Epinephrine for severe allergies (if necessary, help the casualty to use it)
For a sting in the mouth:
Give the casualty ice to suck or cold water to sip to minimise swelling.
Seek medical aid.
Reassure the casualty.
YOUR AIMS
◉ To reassure the casualty.
◉ To prevent the spread of venom through the body.
◉ Identify the type of snake.
◉ Arrange urgent evacuation to medical aid.
SIGNS AND SYMPTOMS
(These can differ between species).
◉ A pair of puncture marks.
◉ Severe pain at the site of the bite.
◉ Redness and swelling at the site of the bite.
◉ Nausea and vomiting.
◉ Disturbed vision.
◉ Increased salivation and sweating.
◉ In extreme cases, laboured breathing or breathing may stop altogether.
YOUR ACTIONS
◉ Lie the casualty down.
◉ Reassure the casualty and keep them calm and still.
◉ Wash the wound.
◉ Wipe or pat the wound dry with clean swabs.
◉ Immobilise the injury.
◉ Lightly compress the limb above the injury with a roller bandage.
◉ If the casualty stops breathing be prepared to resuscitate.
◉ Arrange evacuation to medical aid.
YOUR AIMS
◉ Maintain airway, breathing, circulation.
◉ Attempt to discover cause.
◉ Remove any contaminated clothing.
◉ Arrange urgent evacuation to medical aid.
SIGNS AND SYMPTOMS
◉ Evidence, such as containers, vomit, tablets and smells.
◉ Casualty may be delirious.
◉ Possible difficulty in breathing.
◉ Unconsciousness may develop.
◉ Retching, vomiting or diarrhoea.
◉ Bums may be present.
GENERAL ACTIONS
Conscious Casualty:
◉ Ask casualty what happened.
◉ Beware of contamination.
◉ DO NOT induce vomiting.
◉ Place the casualty in the recovery position.
◉ Get medical aid immediately.
Unconscious Casualty:
◉ Beware of contamination.
◉ Carry out ABC of resuscitation.
◉ Place in recovery position.
◉ Evacuate urgently to medical aid.
The comfort, safety and well-being of the casualty are amongst your primary considerations and you must make sure that the casualty's condition will not be made worse by careless handling or movement.
◉ STRETCHERS
Do not use your hands to open the stretcher runners. They bite! Use your feet to kick them open.
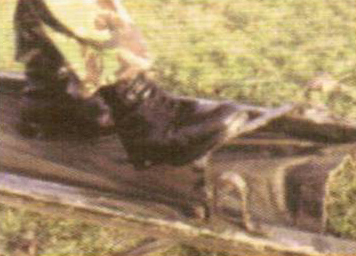
◉ THE DRAG METHOD
The drag method involves pulling the casualty along the ground without lifting. It should only be used where a casualty is unable to stand and must be moved quickly from a source of danger.

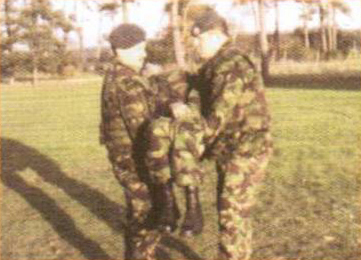
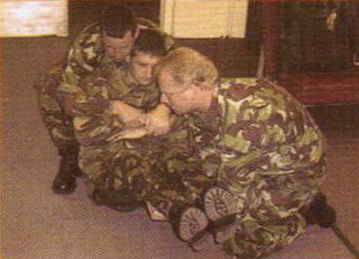
◉ THE TWO-HANDED SEAT LIFT
The two-handed seat method is used to carry a casualty who is unable to assist the bearers.
◉ THE FORE-AND-AFT CARRY
The fore-and-aft carry is used to move a casualty to a stretcher or carry-chair.
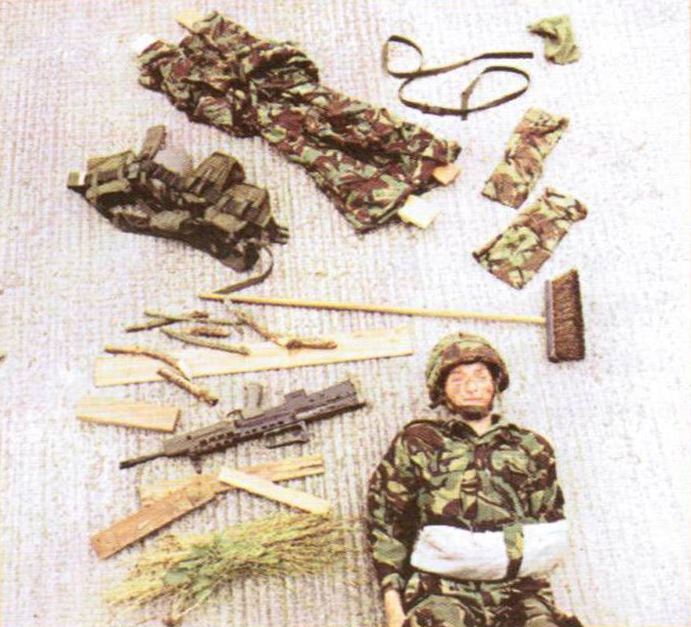
◉ More often than not, you will have a casualty but nothing to treat them with and you will have to improvise.
◉ Improvisation means making use of materials and facilities immediately on hand to treat your casualty.
Items that can be used are:
◉ Clothing for padding.
◉ Clothing for dressings.
◉ Slings for support.
◉ Bandages for padding.
◉ Strapping for supports.
◉ Webbing for padding.
◉ Boards for splints.
◉ Foliage for padding.
SURVIVE TO FIGHT (FORMERLY ISSUED AS JSP 410)
NBC Weapons may be used in any future conflict, whatever its nature and location. You have been provided with equipment that will allow you to survive such attacks and continue to operate. To do so you must be thoroughly familiar with the drills and skills for its use and practise them routinely. These are individual procedures, to be carried out correctly and without supervision each and every time that you find yourself at risk.
Each Task is laid out in the same way:
◉ What you have to know and/or be able to do.
◉ Notes which give you the information you need.
◉ What you have to practice to become proficient.
Your life could depend on your ability to perform these Tasks quickly and correctly. Use this handbook to maintain your skills so that you will survive to fight.
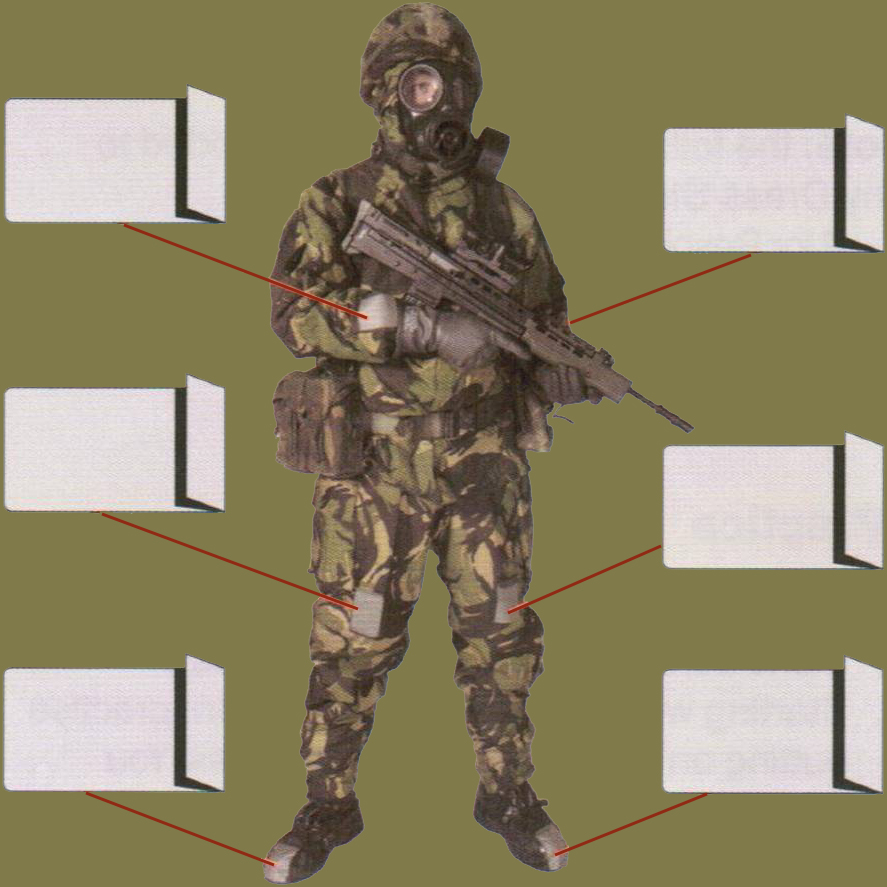
TASK 1. NBC INDIVIDUAL PROTECTIVE EQUIPMENT (IPE)
You have to be able to:
a. Recognise all items of NBC IPE.
b. Stow the relevant items properly in the haversack.
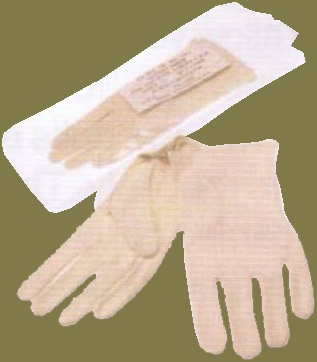
NBC Gloves Inner
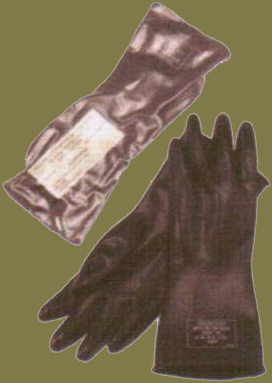
NBC Gloves Outer
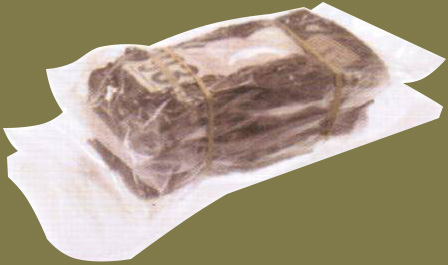
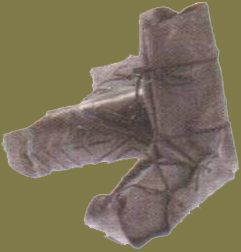
Mk 4 Protective Suit wrapped
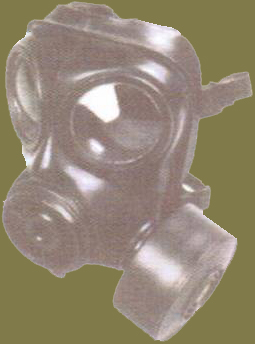
S10 Respirator and Canister
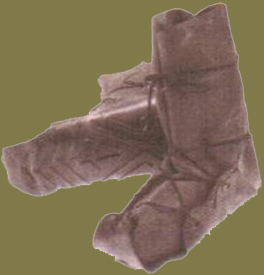
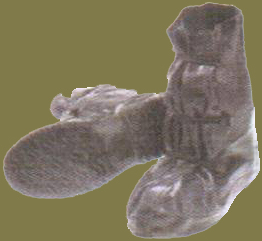
Mk 4 NBC Overboots
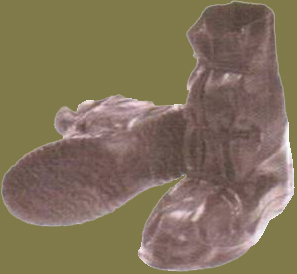
Mk 5 NBC Overboots
Boots wrapped
◉ IPE is shown wrapped for recognition purposes only.
Respirator Haversack Stowage
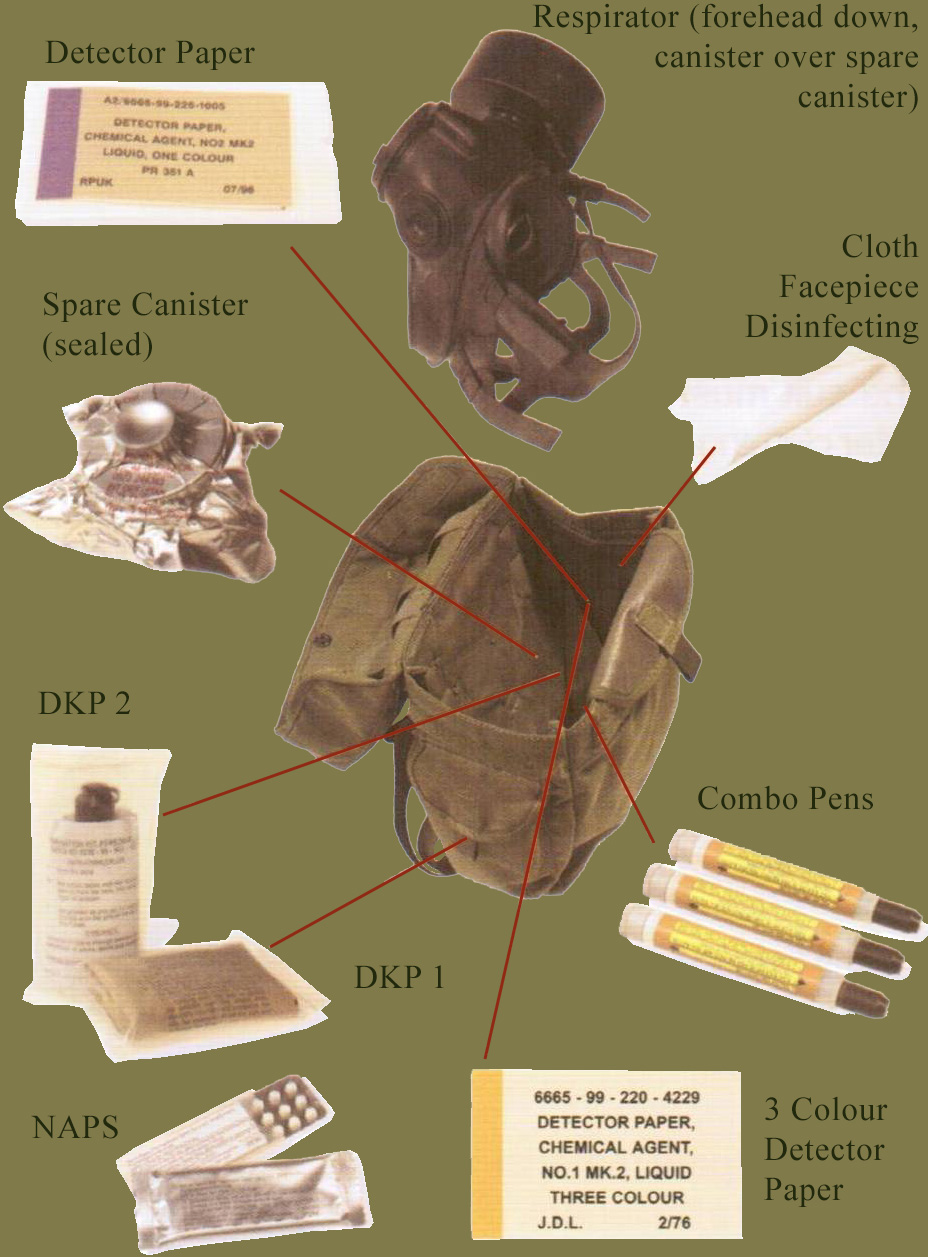
◉ NAPS (if issued) stowage as per unit SOP. Practice
a. Make sure you can identify and name all pieces of IPE.
b. Stowing the haversack correctly.
TASK 2. DONNING IPE AND THE NBC DRESS STATES
You have to be able to:
a. Put on IPE so that it fits correctly.
b. Attach Detector Paper to your IPE.
c. Know the Dress States.
Study Notes
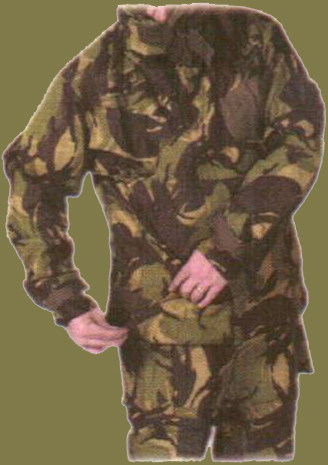
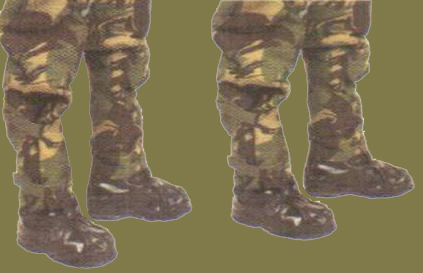
The Mk 4 suit comes in 5 standard sizes and a special size. Know your own size. The suit must be worn over at least one layer of outer clothing, normally a combat suit, together with underwear which covers the armpits and crotch.
Putting on IPE
Trousers
Cross the braces over the chest.
Pass through loops from the outside inwards and tie in a bow.
Take up spare material with velcro fasteners.

Jacket
Do up zip to neck.
Fasten neck, waist and cuffs with velcro fasteners.
Overboots
NOTE: The Mk 4 Overboot is to be replaced by the Mk 5 Overboot. (Both offer suitable protection).
The Mk 4 Overboot has 3 sizes, no left or right fittings.
The Mk 5 Overboot has 6 sizes, with left and right circular knurled indicators on the upper outside edge of the boot.
Mk 4
Mk 5
Mk 4 - Lace up following the diagram with each pair. Use the hooks or, if these are lost, holes through the tabs. Mk 5 - Fasten by pulling the 3 elasticated loops across.
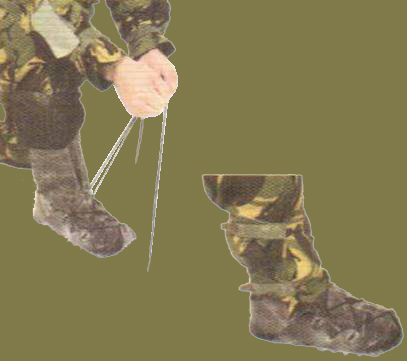
Mk 4
Pull trouser legs overtop of overboots and secure the side velcro fasteners.
Mk 5
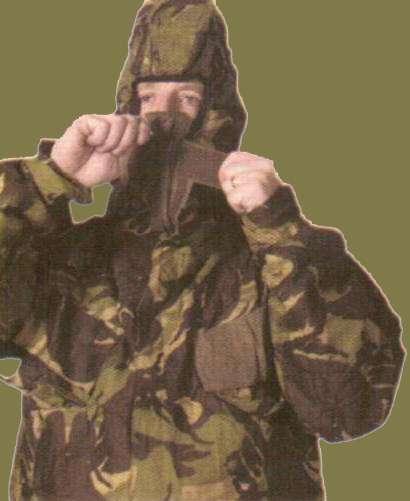
Hood
Pull hood over head and secure by velcro fastener. Pull out flap to ensure a good seal.
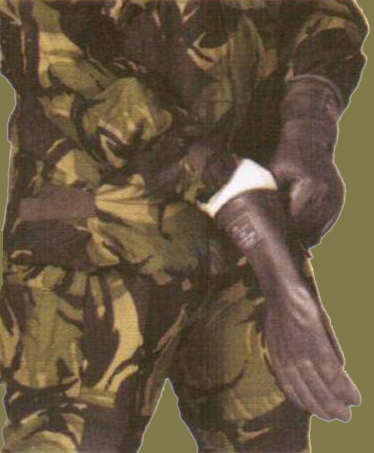
Gloves
White inner cotton gloves first, cuff under jacket cuff. Pull outer gloves on over the cuff of the jacket.
The S10 Respirator
The S10 will protect your eyes, nose, throat, lungs and face against biological and chemical agents and radioactive dust. It comes in 4 sizes. The main parts of the facepiece are shown here. The canister mount can be fitted to either the left or right side. It must be changed by your NBC instructor. There is a different eyepiece for those who need corrective lenses.
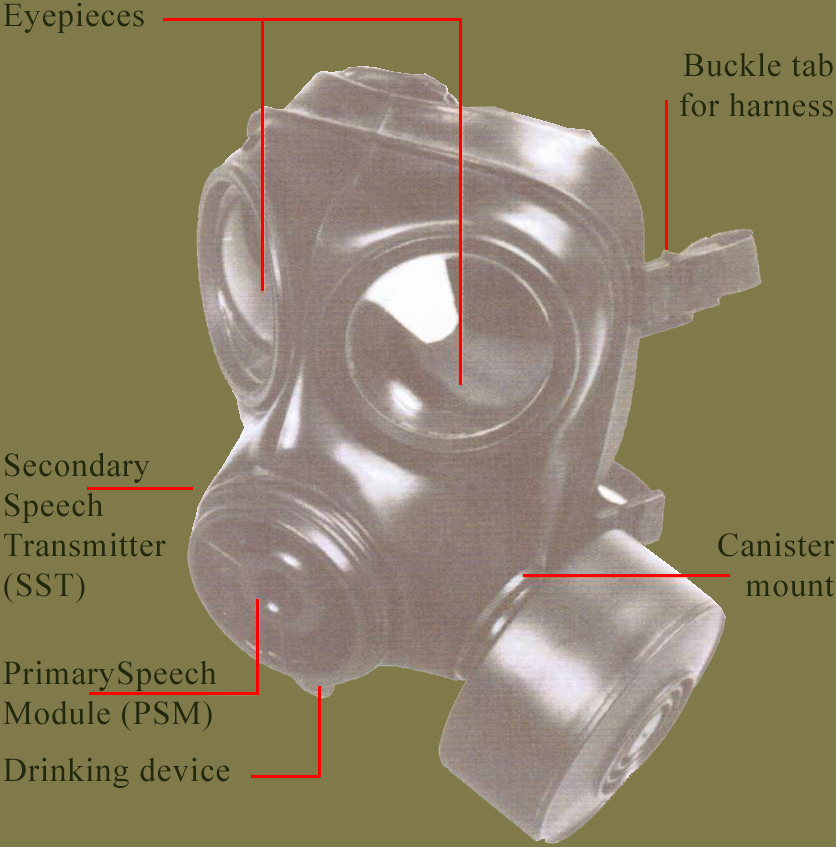
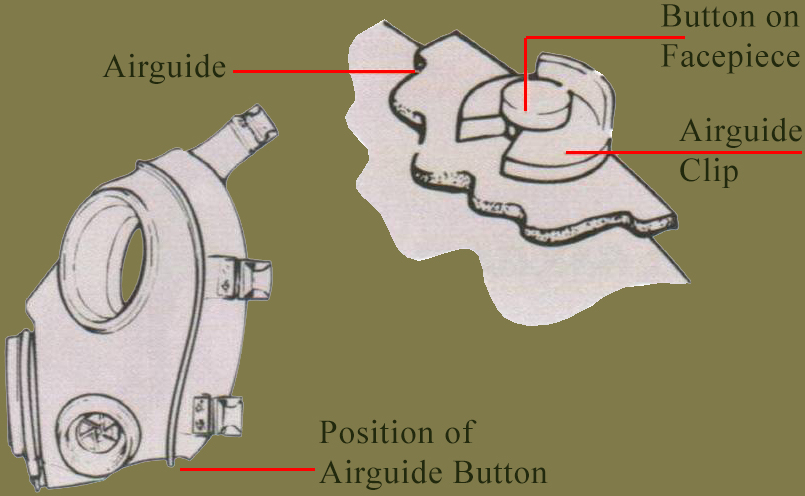
Airguide Clip
An unbuttoned airguide may lead to misting of the eyepieces. Check it is correctly fastened at frequent intervals, particularly after cleaning.
Drill for Donning
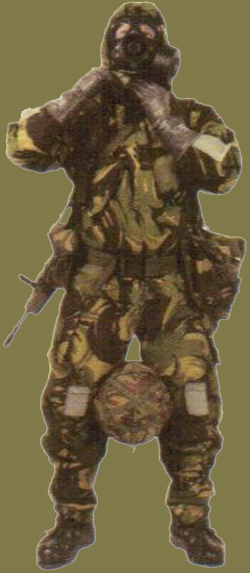
Stop breathing, close eyes, turn back to wind, lean forward, shield hands. Remove helmet (and spectacles). Place helmet between knees, top uppermost.
Pull back hood.
Grasp the respirator by the PSM and remove from haversack.
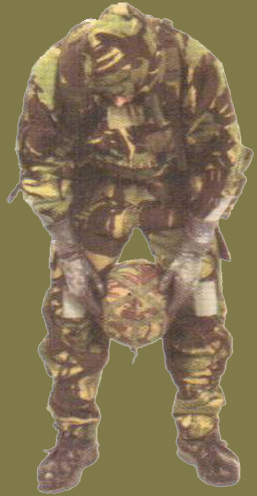
Put thumbs under bottom 4 harness straps and keep apart. Thrust chin into facepiece.
Pull harness over head allowing plenty of space, release gently. Check head pad is central and no straps are twisted.
Blow out hard.
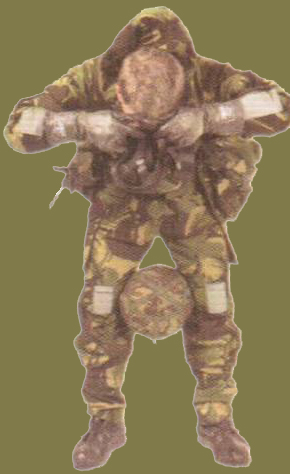
Shout "GAS, GAS, GAS".
Continue normal breathing, open eyes.
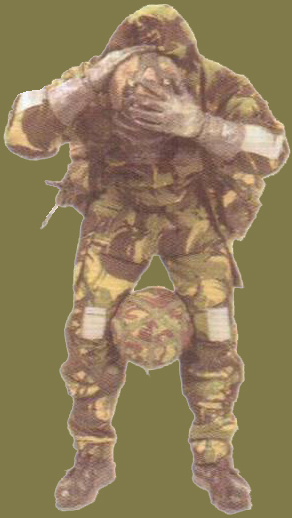
Pull up hood.
Check elasticated edge of hood located over rib of respirator. Check seal of suit under chin.
Replace helmet, (pick up glasses).
Do up haversack.
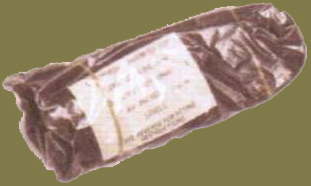
1 Colour Detector Paper
Stick one sheet to each receptor patch on suit and on overboots.
Dress States
| State | Meaning | |
| 0 | Respirator/Mask Carried | 1st set of IPE within Unit |
| 1 | Respirator/Mask Carried | IPE carried or immediately available |
| 2 | Respirator/Mask Carried | Suit worn, Boots & Gloves carried |
| 3 | Respirator/Mask Carried | Suit & Boots worn, Gloves carried |
| 4 | Respirator/Mask Carried | Suit, Boots & Gloves worn (Hood Up) |
Note: the following suffixes may be added to any Dress State -
a R for Respirator worn. (NATO allies may use M).
b. JACKET OPEN or JACKET OFF to allow for ventilation and can be added for Dress States 2 or 3.
Practice
a. Practise putting on suit and overboots.
b. Make sure your items are correct size.
c. Starting with hood up and helmet on, practise putting on your respirator and gloves. You must learn to don the respirator, following the correct drill, within 9 seconds.
We have much more interesting information on this site.
Click MENU to check it out!
∎ cartalana.com© 2009-2025 ∎ mailto: cartalana@cartalana.com